Nose drawing ideas can range from the realistic to the abstract, capturing the unique characteristics that make each nose distinctive. Every shape, line, and contour can indicate a different emotion or personality, presenting endless possibilities for creativity and expression.
Nose Drawing Ideas
Mastering various nose drawing ideas can greatly improve your art. It helps in adding realistic details to any character, making them look unique and lifelike. This skill is highly beneficial for all your future projects, whether you are sketching portraits, creating comic characters or designing for games. So, experimenting with nose drawing can truly enhance your overall drawing experience.
How To Draw A Nose
Drawing a nose is an essential art skill that brings character to life and makes portraits more realistic. Achieving a unique and true-to-life design depends on mastering the basic shapes and experimenting with various styles.
Drawing:
Drawing a nose starts with a simple upside-down triangle and a round oval on top. Adjust the width and length of these shapes to create distinct variations. In this brief guide, first, draw and color a triangle and then blend it with a stump to add roundness. Next, add the nostrils and wings with parenthesis-like shapes, and finish by gently defining the contours of the oval.
Materials:
- Light 3H pencil
- Blending stump
- Paper
How To Draw A Nose Step By Step
Understanding the process of drawing a nose opens the door to producing captivating, lifelike portraits. Each drawn nose injects personality and genuineness into your artwork, effectively bringing your art piece to life.
Drawing:
Watch, practice, and master the art of nose drawing via a simple six-step tutorial. Initiate by crafting a circle, then sketch the bridge and wings of the nose. Following this, softly outline the nostrils, add details, and then apply gentle shading; remember, the lightest touches can make the most significant differences. Keeping this method in mind will facilitate evoking a realistic nose.
Materials:
To achieve this creative journey, you'll require:
- Sketch Pad
- Pencils (different grades)
- Eraser
- Smudging Stump
How To Draw A Nose For Beginners
Drawing a nose is a fundamental aspect of sketching portraits, as it gives faces their distinct appearance. It's crucial for capturing a face's individuality and for bringing your portraits to life. These simple steps make it possible for anyone to craft realistic noses quickly and easily.
Drawing:
The easiest way to start drawing a beginner-friendly nose is to first sketch a diamond shape as a guide. The tip of the nose is designed as an oval at the top of the diamond, giving a sense of the tilt and angle. The nostrils are placed at the lower part of the diamond, with lines and details added to flesh out the shape. Lastly, shading around the nostrils and under the nose adds the final touch of realism.
Materials:
- Graphite pencil
- Eraser
- Sketch paper
How To Draw A Nose
The art of drawing a nose allows one to express human individuality in sketches. It helps to create more lifelike portraits, capturing unique nose shapes to bring characters to life. It enhances an artist's skill set, ensuring everyone's likeness is accurate and realistic.
Drawing:
Starting with a large circle for the nose's ball and two smaller overlapping circles for the nostrils, use parentheses shapes to define the nostril edges. Next, create the nostril openings and the bottom of the nose using the overlapping circles as a guide. Remember, shading plays a vital role in creating the bridge, ball, and nostril areas, so darken or lighten accordingly for a realistic touch.
Materials:
- Pencil
- Eraser
- Blending tool
- Sketch pad or paper
How To Draw A Nose
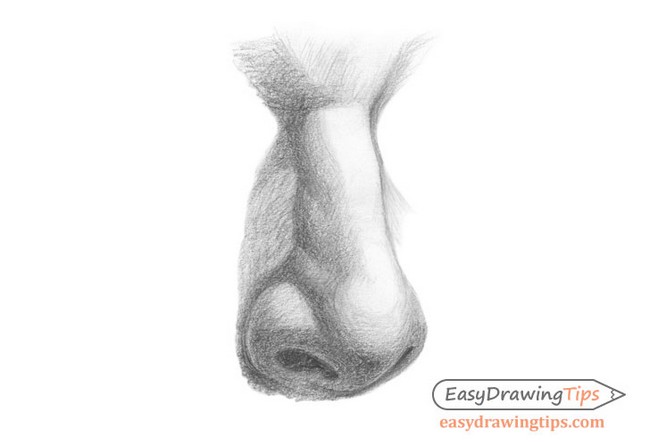
Capturing the side view of a nose is the key to creating authentic, vivid sketches and elevating your drawing skills. It introduces you to the intricacies of shaping and shading, refining your understanding of perspectives and angles.
Drawing:
Mastering the side view of a nose starts with sketching a teardrop shape as a guideline. The tip of the teardrop acts as the nose tip, while its wider part forms the bridge. Sketch the nostril as a half-circle with a slight arch to depict the nose's wing. Pay particular attention to the bridge's curve and the nostril's shading to capture the nose's profile accurately. Finally, consider the light source while shading to make your nose draw more three-dimensional and lifelike.
Materials:
- Pencil
- Eraser
- Drawing paper
- Blending tool (optional)
How I Draw A Nose

Drawing a nose brings life to a face in a sketch. It's a key detail that adds depth and character to portraits, making the artwork feel more accurate and more alive. It's also a fun way to learn and excel in the art of drawing, refining your skills one stroke at a time.
Drawing:
The drawing process unfolds with an inverted triangle. This simple shape provides a solid base for the nose, with the upper parts becoming the nostrils. The sketch then evolves with the shaping of soft curves to build the contour. The final details fill the shape, imparting a realistic touch to the nose. Every drawn nose tells a unique tale waiting to spring to life!
Materials:
- Any preferred casual paper (Could be printer paper, card stock, or watercolor paper)
- Pencil medium of choice (graphite or colored pencil recommended)
- A blending stump or tortillon for better blending
How To Draw & Shade A Nose In Three-Quarter View
Learning how to draw and shade a nose in a three-quarter view unlocks the potential to create stunning, lifelike portraits. This skill takes your artistry to new heights, allowing your creations to connect on a deeper level with anyone gazing upon them.
Drawing:
This straightforward process begins with an essential line drawing of the nose's primary shape. Next, the addition of more minor details like bends and surfaces paves the way to shading. Basic shading starts by analyzing light and dark areas, gradually adding layers to build depth. Final touches involve refining and smoothing shading to achieve a beautiful and natural representation of the nose.
Materials:
- Pencil
- Drawing paper
- Eraser
How To Draw A Dog Nose
Portrait artists value the art of drawing a dog nose for its blend of simplicity and character capture. For pet lovers, this adds charm to their illustrations. Perfecting a dog's nose gives art pieces a lifelike touch.
Drawing:
Begin by sketching an upside-down cone-like shape. Position and size depend on the rest of your drawing. Add a vertical center line for balance; further sketch two rounded shapes on either side for nostrils. Connect them to the base of the cone while maintaining rounded lines. Erase extra sketch lines to refine your dog's nose. Shadowing is the final touch to bring depth to your artwork.
Materials:
- Sketch pencil
- Drawing paper
- Eraser
How To Draw A Nose
 Drawing a nose is a crucial skill for capturing lovely human faces in your artwork. Perfecting this vital feature makes your drawings more lifelike and enables you to explore creative styles like cartoons and caricatures, where the nose can be a dramatic focal point.
Drawing:
The secret to drawing a beautiful nose is to follow a step-by-step method. Begin with a basic shape, refine the contours, and add shading for a three-dimensional effect. Practice and patience will help you achieve a nose masterpiece and build your drawing expertise.
Materials:
- Pencil
- Eraser
- Paper
How To Draw Simple Nose

The simple nose drawing is beneficial for getting a solid grasp of shading and texture techniques. These skills make your artwork pop off the page with dimension and reward you with a gratifying sense of accomplishment.
Drawing:
Learning to draw a simple nose starts with a linear representation, much like a sketch. The grid method is beneficial here for straight-on views. After ensuring the drawing's accuracy, carefully rub off the grid lines. Softly develop patterns of light and dark, keeping the shading technique close to that of a sphere. Bring light reflection along the edges and a shadow edge under the tip to create depth. The final touch involves blending tones to smoothness. In the process, keep the highlights at their whitest while avoiding too much light in other skin tones.
Materials:
- Mechanical pencil
- Grid paper
- Kneaded eraser
- Pencil for shading
- Stump for blending
How To Draw A Nose By Sketching

Learning to sketch a nose adds realism to your art. The technique brings portraits to life, capturing unique human features with accuracy. This skill set levels up your artistic journey, making expressions more natural and believable.
Drawing:
In drawing a nose, start by lightly outlining the structure of the nose with an HB pencil. Shade it uniform, focusing on gradual tone changes. The nose tip and bridge should display a lighter tone due to light reflections. As you proceed, utilize a 4B pencil for medium-tone shading. The nostril's interior has a dark tone. Always remember each detail brings your sketch closer to reality.
Materials:
- Sketching Pencil set
- Paper
- Eraser
How To Draw A Realistic Nose From The Front

Mastering the technique of drawing a realistic nose from the front is a step forward in the journey of artistry. It leads to a greater understanding of human facial features and gives depth to portraiture, providing an effortless transition from novice to adept artist.
Drawing:
It starts with a soft circle. From here, creating lines for the nose bridge, the process moves on to elaborating the rest of the outline. Careful shading highlights the intricacies of the nose structure, showcasing the play of light and shadows. The final stage involves defining the nostril outlines, shading them, and executing a few refining touches for a natural, realistic nose drawing.
Materials:
- HB Pencil
- 2B Pencil
- 4B Pencil
- Kneadable Eraser
- Drawing Paper
- A Blending Stump
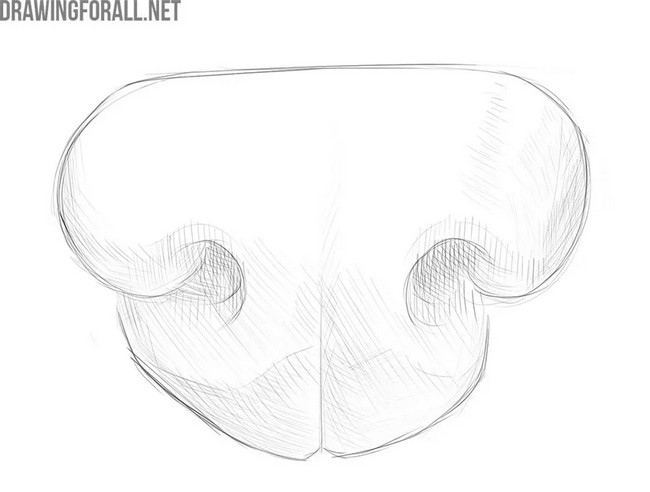
How To Draw A Nose In Just 5 Steps
Drawing a nose isn't a mystery anymore. It's a crucial element that adds an authentic touch to any portrait sketch. It enhances the recognition value of a sketch and makes it look more lifelike. Understand that it's not an isolated entity but an engaging subject tied to the overall credibility of the face drawn.
Drawing:
There is magic in the mundane, and the same applies to drawing a nose. This powerful subject starts with a simple geometric form, moved by a sense of symmetry. Begin with a vertical line and three overlapping circles. Then, draw a trapezium to represent the bridge and its adjacent sections. The sphere at the end helps envision the play of light and shadow. All the lines elegantly come together to shape the nose. The fun part kicks in while breathing life into this sketch with clever shading. The magic unfolds from the darkest areas, evolves with halftones and culminates into the lightest tones, making the drawing come alive.
Materials:
- Arteza Professional Drawing Set
- Eraser
- Sketchbook
How To Draw Nose Front View
Knowing how to draw a nose is crucial in the realm of portrait artistry. Every individual's nose has a unique shape, and summarizing these nuances is part of what gives a portrait life. The front view of a nose, specifically, is fundamental to nail since it's often the most prominent perspective in most portraits.
Drawing
To capture the nose from a front view, it's a matter of three easy steps. The first involves sketching three overlapping circles to represent the nose bridge and nostrils, with the center circle being larger. Next, construction lines are drawn to outline the nose using the circles as a guide. Lastly, the magic of the image comes alive through shading and adding highlights to mimic the natural shadows and bright spots on a nose. It's a simple process, but it makes the nose on paper appear more realistic.
Materials
- Drawing Paper
- HB Pencil
- 2B Pencil
- 4B Pencil
- 6B Pencil
- Kneaded Eraser
- Mono Zero Type Eraser (Optional)
- Soft Paint Brush
Nose Drawing

Nose drawing is a fantastic skill for making realistic portraits come alive. This skill helps in creating beautiful, lifelike pictures of individuals from any angle. By mastering the art of drawing noses in a ¾ view, you'll be able to bring depth and personality to your artistic creations.
Drawing:
Drawing a nose from the ¾ view involves a few essential steps. First, draw a long vertical line to indicate the center of the face. Then, create light guidelines to sketch the nose's basic shape, including the bridge and wings. Next, use darker lines to define the nose's outline and bring out its natural curves. Finally, add shading and hatching techniques to give the nose a voluminous and detailed appearance.
Materials:
- Pencil
- Eraser
- Paper
- Mirror (for checking proportions)
How To Draw A Nose With Easy Steps

Learning to draw a nose with straightforward steps opens a world of artistic possibilities for individuals of all ages. It's valuable for those seeking to improve their sketching skills, creating inspiring portraits or simply interested in exploring artistry. This technique offers a solid foundation, making the entire drawing process easy, accessible, and enjoyable.
Drawing:
This process begins with a simple outline made up of three light pencil strokes. These create the basis for your nose sketch and lead the way for its completion. It involves adding features such as the nostrils and the bridge by drawing curved lines and circular shapes, which are later fine-tuned to bring life to the portrait. Soon enough, with a bit of creativity, a wing, and some shading, your nose sketch will be complete!
Materials:
For this process, you will need:
- Sketching Pencils
- An Eraser (preferably Kneaded Rubber Eraser)
- Sketch Pad
- Erasable Colored Pencils
- Fine Markers
How To Draw A Nose
The art of drawing a nose brings countless uses, adding depth and realism to both simplistic and detailed portraits. Perfecting this skill paves the way to improved artistic capabilities, allowing the transformation of simple pencil strokes into lifelike facial features. With a bit of practice, a drawn nose can amplify the authenticity of any human face, serving aesthetic, educational and professional uses for artists at any skill level.
Drawing:
Drawing a nose involves a series of simple steps. Start by sketching a small circle to serve as the nose's tip, keeping pencil pressure light to make corrections later. Slightly curved lines sprouting from this circle create the nose's bridge, and two additional curved lines flesh out the nostrils. Erase lines inside the process, interfering with the nose's overall shape, all while keeping the circle's bottom part as the nose tip. Subtle details like a fine, vertical line down the nose and subtle shading underneath the nostrils can enhance the realism, while coloring serves as a final touch. The process provides a gateway to the world of drawing, bridging the gap between simple shapes and lifelike forms by focusing on a single critical facial feature.
Materials:
- Medium of choice (pencil, pen, marker, etc.)
- Drawing paper
- Eraser
- Compass (optional)
- Coloring materials (watercolors, colored pencils, etc.)
How To Draw A Nose

A splendidly drawn nose is the key that unlocks the charm of a pencil portrait. It imparts life to the image and makes it more realistic. A correctly sketched nose can help you admire the entire piece on a different depth level. It's the subject that gives a portrait its unmistakable identity and personality.
Drawing :
The mission to draw a nose involves three enriching steps. The first step is to sketch the boundaries of the nostrils and outline the brightness and shadow that give the nose its structure. In the subsequent step, the artist has to simplify the shading into three principal tones: dark, medium, and light tone emanating from the paper. Each part of the nose gets its respective tone to manifest its three-dimensional form. In the concluding step, one needs to give careful finishing touches. Soften the lines where each plane connects to the next, forming graduated shading areas. Look closely to find subtle shading variations within each tone, as it is this close observation that elevates your drawing to the next level.
Materials :
- Pencil
- Paper
How To Draw A Nose Step By Step

Mastering the art of drawing a perfect nose can take any portrait to the next level. By learning to draw a nose step by step, anyone can effortlessly add depth and character to a portrait, making it more expressive and lifelike.
Drawing
Drawing a nose is a straightforward process that can be accomplished in six simple steps. Start by creating a basic structure that sets the stage for shaping the nose and follow it up with an outline or contour drawing. Next, add layers of graphite to establish a realistic base and use paper stumps to smoothen the lines. Incorporate charcoal to depict the darkest parts, such as the nostrils, and finish with shading and highlights to convey the realistic appearance of the nose. By following these steps, a stunning and realistic nose will come together effortlessly.
Materials
- Pencil
- Charcoal Pencil
- Kneaded Eraser
- Pencil Sharpener
- Paper Stumps
- Mechanical Pencil
- Drawing Paper (Optional: Photo reference)
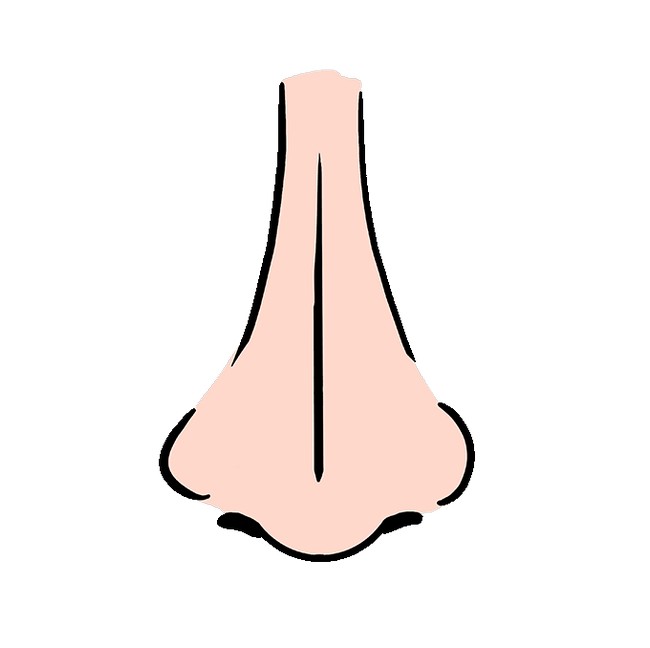
Easy Nose Drawing
 The skill of easy nose drawing sits at the heart of portrait making. A beautifully drawn nose adds life to the faces you sketch, making them seem more realistic. Each person's nose possesses its unique shape and structure. Being skilled in drawing different styles of noses means you can capture the individuality of any face.
Drawing:
Creating an impressive nose starts with understanding its structure. The art of easy nose drawing simplifies this into basic shapes. From the front, the nose can be sketched as an angled rectangle with sides and circles representing the nose tip and nostrils. The side view is done with a triangle shape and two circles for the tip and the visible wing. When drawing from a ¾ angle, start with a rectangle for the nose bridge and add profiles to give it its three-dimensionality. Lastly, details like nostrils, shading and blending are added to create realism.
Materials:
- A sheet of paper
- Two types of graphite pencils (number 2H and numbers 2B to 4B)
- A soft blending tool, like a brush or a towel paper
- A standard eraser
- An eraser for details
- A kneadable eraser